HTML forms are a fundamental part of web development, allowing users to interact with web pages by submitting data to servers. They consist of various elements such as <form>, <input>, <label>, and <button>, each serving a specific purpose in collecting and processing user input. In this article, we'll explore these elements in detail, along with code examples and visible outputs.
Understanding the Components
<form>: This element defines a section of a web page that contains interactive controls for submitting data. It acts as a container for form elements and specifies how the data should be submitted to the server.<input>: This element creates various form controls for user input, such as text fields, checkboxes, radio buttons, and more.<label>: This element associates a label with an input field, providing a textual description or instruction for the input.<button>: This element creates clickable buttons within a form, allowing users to trigger actions like submitting the form or resetting input fields.
Creating a Simple Form
Let's create a basic HTML form that collects a user's name and email address:
html<!DOCTYPE html>
<html lang="en">
<head>
<meta charset="UTF-8">
<meta name="viewport" content="width=device-width, initial-scale=1.0">
<title>Simple Form</title>
</head>
<body>
<h2>Simple Form</h2>
<form action="/submit" method="post">
<div>
<label for="name">Name:</label>
<input type="text" id="name" name="name">
</div>
<div>
<label for="email">Email:</label>
<input type="email" id="email" name="email">
</div>
<button type="submit">Submit</button>
</form>
</body>
</html>
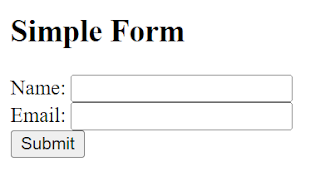
Output:
Explanation
- We use the
<form>element to define our form, specifying theactionattribute to indicate the URL to which the form data will be submitted and themethodattribute to specify the HTTP method (e.g., GET or POST). - Inside the form, we use
<label>elements to provide labels for each input field. Theforattribute of the label corresponds to theidattribute of the associated input field. - We use
<input>elements to create text fields for the user's name and email address. Thetypeattribute specifies the type of input field (e.g., text or email), and theidandnameattributes provide unique identifiers for the input fields. - Finally, we use a
<button>element withtype="submit"to create a submit button that users can click to submit the form.
Conclusion
HTML forms play a crucial role in web development, allowing users to interact with websites by providing input. By understanding the <form>, <input>, <label>, and <button> elements, you can create interactive forms that enhance user experience and facilitate data submission. Experiment with different input types and form controls to create forms tailored to your specific needs


